
EDIT Aug 2015:
There is a revised free pattern on craftsy for this Pouch incl. a template.
Es gibt eine überarbeitete freie Anleitung mit Vorlage für dieses Mäppchen auf Craftsy auch auf Deutsch :).
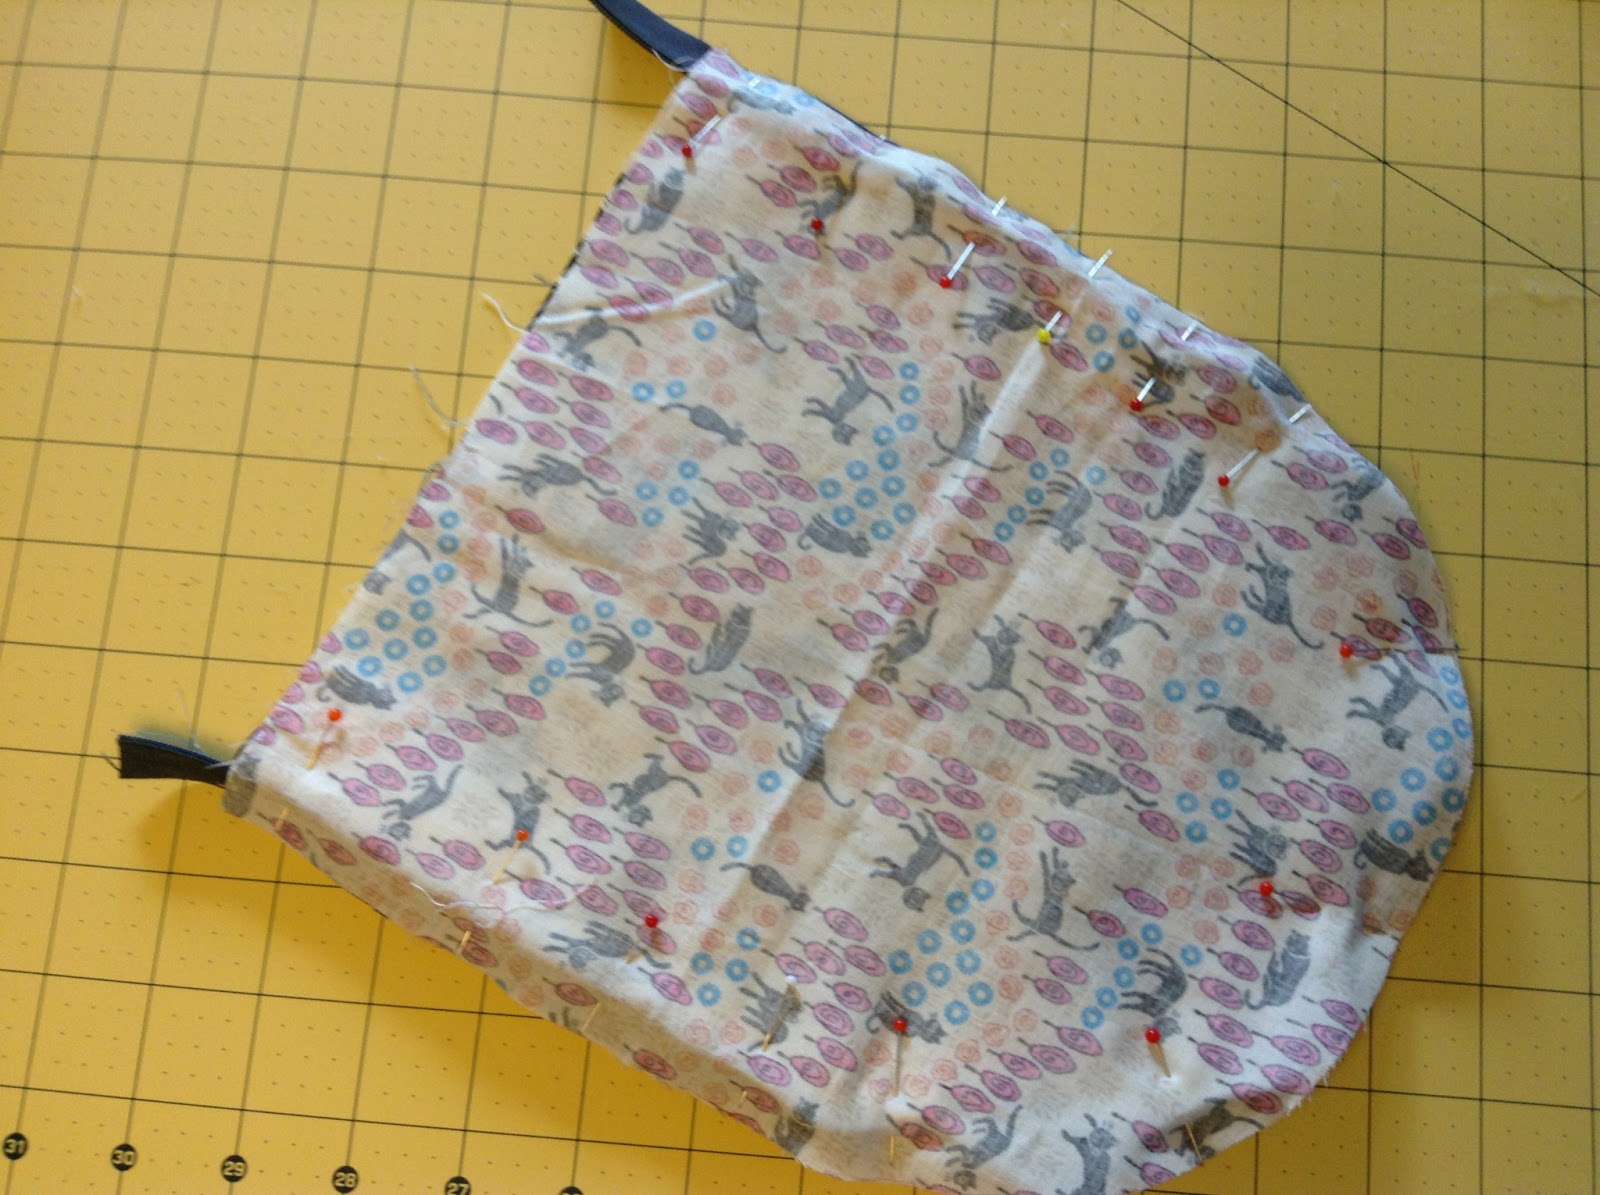
Well, finally I made some pictures to show you how I make the sleeping bag pouch. A big thank you to my daughter who urgently needed a new pouch on a sunday evening 5 minutes before MY Tatort (a German thriller) started. Ok, it was kind of challenging what she tried to explain to me - one szipper around, looks like a sleeping bag, you can see all of your pencils... I understood nothing so we looked up the www and we found the pencil case she saw somewhere (the top left). I though over it and then started to draw a pattern.
Nun habe ich endlich geschafft, Euch Bilder von dem Schlafsäckchen Mäppchen zu zeigen. Ein großes Danke Schön geht hier an meine Tochter, die unbedingt und ganz dringend ein Mäppchen am Sonntag Abend fünf Minuten vor dem "Tatort" brauchte. Das war echt eine Herausforderung als sie versuchte, mir zu erklären, wie das Ding auszusehen hat... ein Reißverschluss rundherum, sieht aus wie ein Schlafsack, du kannst alles Stifte auf einmal sehen... ich verstand gar nichts. Also rein ins WWW auf der Suche nach diesem Mäppchen... wir haben es auch gefunden und so konnte ich es mir genauer anschauen und eine Anleitung zeichnen.
There is a revised free pattern on craftsy for this Pouch incl. a template.
Es gibt eine überarbeitete freie Anleitung mit Vorlage für dieses Mäppchen auf Craftsy auch auf Deutsch :).
Well, finally I made some pictures to show you how I make the sleeping bag pouch. A big thank you to my daughter who urgently needed a new pouch on a sunday evening 5 minutes before MY Tatort (a German thriller) started. Ok, it was kind of challenging what she tried to explain to me - one szipper around, looks like a sleeping bag, you can see all of your pencils... I understood nothing so we looked up the www and we found the pencil case she saw somewhere (the top left). I though over it and then started to draw a pattern.
Nun habe ich endlich geschafft, Euch Bilder von dem Schlafsäckchen Mäppchen zu zeigen. Ein großes Danke Schön geht hier an meine Tochter, die unbedingt und ganz dringend ein Mäppchen am Sonntag Abend fünf Minuten vor dem "Tatort" brauchte. Das war echt eine Herausforderung als sie versuchte, mir zu erklären, wie das Ding auszusehen hat... ein Reißverschluss rundherum, sieht aus wie ein Schlafsack, du kannst alles Stifte auf einmal sehen... ich verstand gar nichts. Also rein ins WWW auf der Suche nach diesem Mäppchen... wir haben es auch gefunden und so konnte ich es mir genauer anschauen und eine Anleitung zeichnen.

The first try was too large so I changed the pattern again and again and now I think it has the pefect size for me and my girl ;-).
Der erste Versuch war zu groß, also habe ich die Vorlage geändert und geändert, bis ich die richtige Größe laut meiner Tochter hatte ;-).


2 fabrics 9 x 10 Inch OR
1 endless zipper 26-28 inch
1 zipper end
alternative 1 "normal" zipper 20 inch - take it longer to make it more easy
fusible interface 9 x 10 inch (I use Vliseline H640 from Freudenberg)
of course paper, scissors, ruler, cutter, pen (I love Frixon)


...but now I will only show the endless zipper - it is much easier to handle. I pin the zipper only at two or three places but please do your way. The zipper should be hanging at the ends about 1,5 inch to put in the zipper-end. I sew the zipper first on the exterior fabric, so it makes it easier to sew the lining on it. Please be caution to place the zipper right - the good side has to look down on the fabric!!! :


Now you will place the zipper-end - some of you maybe can do that alone - not me... I need one more hand here:

So you are almost finished. Turn the pouch again back to the lining side to sew the end together. You can use a zig zag scisser at the end, but I like it more to make my own bias tape from the lining fabric (ap. 1,25*5,5 inch). Iron it doulbe as a bias tape and sew it on the end:
Edit (Nov 2014): I skip the step with the bias tape nowadays and only end with zig-zag to fix the bottom...


That´s it - thank you so much for following my tutorial :)
Aylin...
Edit Nov 2014: I opened a new linky to see all our lovely sleepingbag pouches..... Ich habe eine Linky eingerichtet, damit wir alle unsere süßen Schlafsäckchenmäppchen sehen können.
Hi Aylin... do you have a source for the endless zippers?
ReplyDeleteThanks to all of you. Still learning how to reply Open and hidden ;-)
DeleteI Bus my endless zippers at the market and in the shop trollinge which closed unfortunately. They have an online Shop. But I am sure, that you can find Lots on Easy. Aylinxxx
WOW so many mistakes in this answer: you can buy endless Zipper at lots of places like etsy or dawanda....
DeleteWhat a cool pencil case. I must pin this for future sewing. So happy you have a blog now:)
ReplyDeleteHi Aylin! Was wondering about the tutorial till I saw your blog link on Flickr! These will be great as Teachers' Appreciation gifts! Thank you so much for sharing it with us!
ReplyDeleteI love this!!! I have a fear of zippers that I can't seem to get past, but my girls would LOVE these. I'm not quite sure if I get how to install the regular zipper, but I bet I could find someone to show me. I bet if I could figure out just one it'd get easier. I think I'm going to have to work myself up for this.
ReplyDeleteThe cats so cute! Thanks for the wonderful tutorial.
ReplyDeleteI love this =) thanks for the tutorial!
ReplyDeleteSo, alles rausgesucht (werde wohl ein dickes Volumenvlies anheften, habe nur H630). Eine Frage: Nahtzugabe ist 1/4 inch?
ReplyDeletefabulously cute
ReplyDeleteThat is an absolutely fabulous tutorial!!! Thank you so much!
ReplyDeleteLove it and am going to make one. You did a great job on this!
ReplyDeleteI came back to say that it was soooo fun to make one of these! And I got the same effect you did with your endless zipper by using just one side of a long zipper. I love the sleek look at the top of the pouch! Thanks again!
ReplyDeletehi elenorac, I´m wondering if I understand this right, did you just use ONE SIDE OF A LONG ZIPPER for a "sleeping bag" like this one on the tutorial?
DeleteThis is super cool, thanks for sharing :)
ReplyDeleteVielen Dank für das schöne und schnelle Tutorial. Eine sehr leicht nachvollziehbare Anleitung und ein pfiffiges Ergebnis. Das hat uns schon einen Kindergeburtstag gerettet. Inzwischen sind wir in Serie gegangen und haben noch ein Detail ergänzt - vielleicht ist das ja auch für andere interessant. Deshalb erlaube ich mir mal einen Link - http://marabunte.wordpress.com/2013/09/22/mappchen-in-serie-und-die-werbefrage/ - wenn er stört, bitte einfach löschen.
ReplyDeleteHerzliche Grüße,
Malou.
Sou do Brasil, adorei seu tutorial! 😚
ReplyDeletePosso dizer que gostei muito , Sou do Brasil, adorei Seu tutorial!!
ReplyDeleteI just made one, also using fabric in cat print! This was so easy and fun! Thank you for your tutorial!
ReplyDeleteGreat tute, thank you!
ReplyDeleteDanke für dein Tutorial. Es hat Spaß gemacht die kleinen Schlafsäckchen zu nähen. Wenn du magst, kannst du bei mir mal schaun. Da zeige ich gleich acht auf einen Streich.
ReplyDeletelg otti
Erledigt :-)
ReplyDeletelg otti
A Furious Traveler obviously need to learn about this method. Thanks for sharing with us......
ReplyDeleteThis is a great tutorial and fabulous pouches! Thanks!
ReplyDeleteMarlene
You won't believe this Seattle Immigration Attorney
Vielen Dank für das tolle Muster!
ReplyDeleteLG
Bente
This looks great and I'd love to have a go. I have tried clicking on your link for the pattern and template but I can't find it. I would be really grateful if you could help - I would love to get a copy of the template. Thank you
ReplyDeleteThanks so much for this post. You have no idea how much this helped me out. Keep up the awesome work here!
ReplyDeleteodor proof purse
replica bags in gaffar market replica bags nyc replica bags philippines greenhills
ReplyDeleteRecommended Site replica bags buy online visit their website replica bags from china recommended you read www.dolabuy.co
ReplyDelete